Showing posts with label homemade. Show all posts

Tuesday, 1 September 2015

Recipe: Coconut and Avocado Protein Popsicles

coconut-avocado-protein-popsicles-cutandjacked-scr1.jpg

Makes 5 popsicles (3oz or 90ml each).
Ingredients
  • 1 medium avocado (150g)
  • 1 cup unsweetened coconut milk (240ml)
  • 6 drops coconut stevia (or to taste)
  • 1/4 cup unflavored whey protein powder (23g)
  • 2 tablespoons unsweetened shredded coconut (15g)

coconut-avocado-protein-popsicles-cutandjacked-scr2.jpg

Instructions

  • Combine avocado, coconut milk, and stevia in a blender or food processor until smooth.
  • Add whey protein and blend until smooth.
  • Stir in shredded coconut.
  • Spoon into popsicle mold. Tap the bottom of the mold a few times to level the mixture and to release any air bubbles.
  • Cover mold and insert popsicle sticks.
  • Freeze for 4 hours or more.
  • Release popsicles from mold, and enjoy!

Stats
Per popsicle:
Protein: 5g,
Carbs: 5g (2g fiber, 1g sugar),
Fat: 6g,
Calories: 91

Comment below what you think. Did you like them? Will you try them out? Let me know :)


Source
http://www.cutandjacked.com/Coconut-Avocado-Protein-Popsicles-Recipe

Tuesday, 11 August 2015

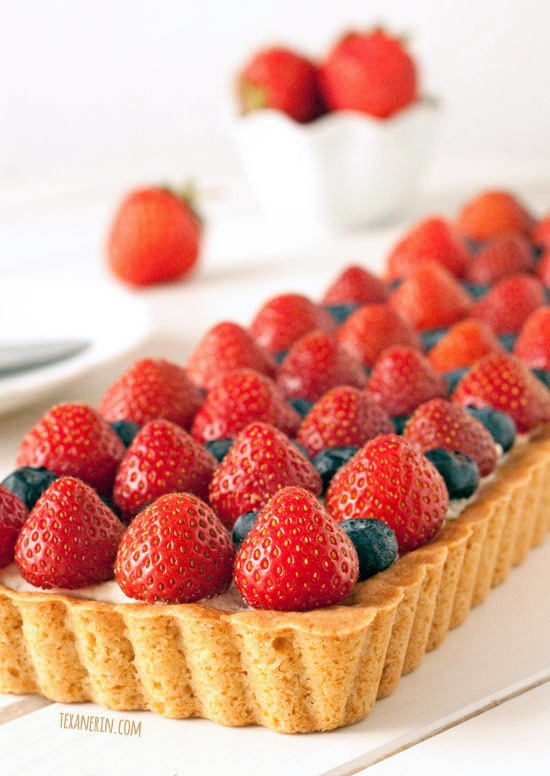
Greek Yogurt Berry Cookie Tart (100% whole grain)

Quick and easy to put together, this healthier 100% whole grain cookie tart has a creamy Greek yogurt, white chocolate and cream cheese filling!

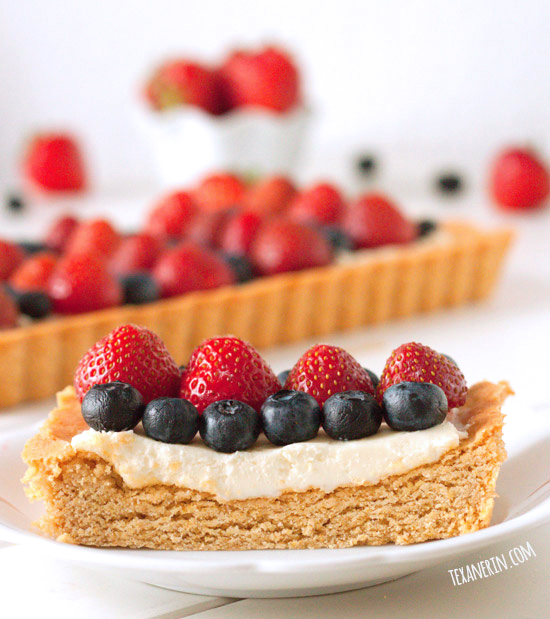
Greek Yogurt Berry Cookie Tart – 100% whole grain but nobody will be able to tell!

When I arrived back home a week ago, Mr. T had made this awesome tasting but very high in calorie fruit pizza for me. And we decided that I had to recreate it and make it a little bit healthier! The filling in this one is made out of Greek yogurt, cream cheese and white chocolate. It’s super quick and easy to whip up and a breeze to decorate, which is always a score for someone like myself who has no decorating skills. Just toss on some blueberries and strawberries and you’ve got a great little dessert for July 4th.
I made two versions of this Greek yogurt cookie tart. One with a more traditional crust with very little sugar and some coconut oil. I used all whole wheat pastry flour, which I had brought back with me, and it was a huge failure. And then I tried again but with a cookie crust. And with butter and a lot more sugar. I guess it shouldn’t be a surprise that this version was SO much better.
The crust isn’t too hard and not too soft. I’d say it’s kind of like a Lofthouse cookie. While I really loved the tart Mr. T made for me, I found myself leaving the crust behind. It just wasn’t soft enough for my liking. With this version, the crust is just as good as the topping! No wasted calories here.
This time I went with half white whole wheat and half whole wheat pastry flour. I don’t recommend using regular whole wheat flour for your cookie tart crust unless you want your cookie base to taste healthy. I was worried that there might still be a slight whole wheat taste, even with my combination of the two flours, so I used some lemon extract and zest which resulted in a crust that’s light and lemony. No whole wheat taste here!

100% Whole Grain Greek Yogurt Berry Cookie Tart

Now we need to talk about white chocolate. While I was living in the US, I wasn’t really into baking like I am now. And I never used white chocolate, just because I didn’t come across any white chocolate recipes I really wanted to try.
Then I moved to Germany and started experimenting with white chocolate. I buy the cheapest brand and even that’s amazing. I always shrugged and admittedly rolled my eyes at the warnings on recipes from other bloggers. “Make sure to use a high quality white chocolate!” And so many people wrote comments on my blog about how they didn’t like white chocolate. I just couldn’t understand it. To me, it was like saying you don’t like puppies or little ducklings or something. It just couldn’t be.
But now I understand.
White chocolate in the US? That stuff was disgusting. It tasted like plastic and chemicals. My mother had a few different brands in her pantry and I didn’t like any of ’em. From what I’ve read and heard, Ghirardelli is the best. So please… do not make this recipe with the cheap stuff! (unless you live in Europe, where the cheap stuff is good :))
And one final thing to note is that your filling will be thicker than what you see here. I might have eaten about… a third of it waiting for my cookie crust to cool. It was just too good. So I apologize for the unrepresentative picture! Just imagine the filling being as thick as the crust.
Prefer a grain-free version? Check out this grain-free blueberry tart from My Whole Food Life!

Greek Yogurt Berry Cookie Tart

♥♥♥♥♥
Rated 5.0 by 3 readers
Greek Yogurt Berry Cookie Tart (100% whole grain)
  • Prep Time: 
  • Cook Time: 
  • Ready in: 
  • Yield: 12 servings

Ingredients

    For the cookie crust:

  • 5 tablespoons (70 grams) butter
  • ½ cup + 2 tablespoons (125 grams) unrefined or white sugar
  • 1 egg, room temperature
  • 2 teaspoons lemon zest
  • 1½ teaspoons lemon extract
  • ¾ cup (93 grams) white whole wheat flour
  • ¾ cup (93 grams) whole wheat pastry flour
  • ¼ tsp salt
  • ¼ tsp baking soda
  • For the filling:

  • ¾ cup (110 grams) white chocolate
  • 8 ounces (225 grams) cream cheese
  • ½ cup Greek yogurt
  • To decorate:

  • strawberries and blueberries

Directions

    For the cookie crust:

  1. Preheat the oven to 350 degrees F (176 degrees C).
  2. Beat together the butter and sugar until fluffy.
  3. Add the egg, lemon zest and lemon extract and mix until well combined.
  4. Add the remaining ingredients (white whole wheat, flour through baking soda) and mix for a minute or until well combined.
  5. Press into the bottom and all the way up the sides of a 14"x5" tart pan and bake for 15 minutes.
  6. Let the tart cool completely before filling.
  7. For the filling:

  8. In a large microwave safe bowl, melt the white chocolate on half power in 20 second increments, stirring after each 20 seconds, until melted.
  9. Add the cream cheese and Greek yogurt and with a hand mixer, beat together until well combined. Spread this over the cooled cookie crust.
  10. Cover and store in the refrigerator until serving.
  11. Before serving, add the strawberries and blueberries or any other fruit you'd like.

Notes

  • If you add the berries the night before, I'm afraid that they'll bleed and look rumply in the morning. So please decorate just before serving!
  • Only use a high quality white chocolate. If it's not good enough to eat on its own, it's probably not good enough to use in this tart.
Source
http://www.texanerin.com/2013/07/greek-yogurt-berry-cookie-tart.html

Monday, 10 August 2015

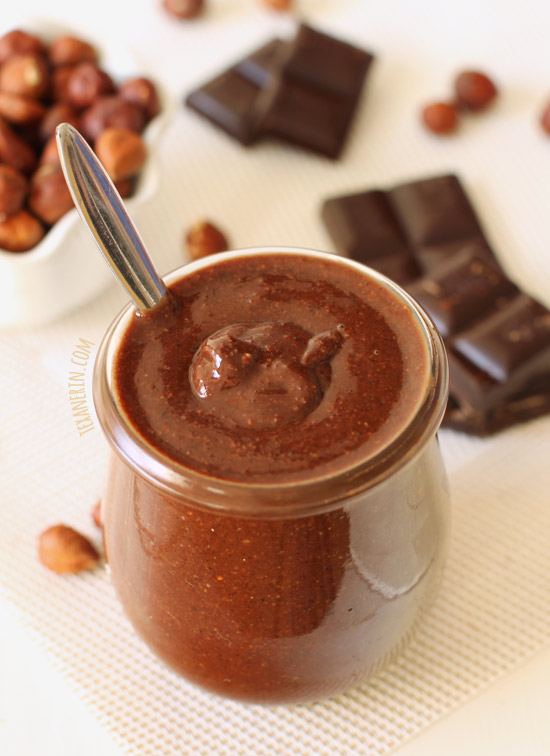
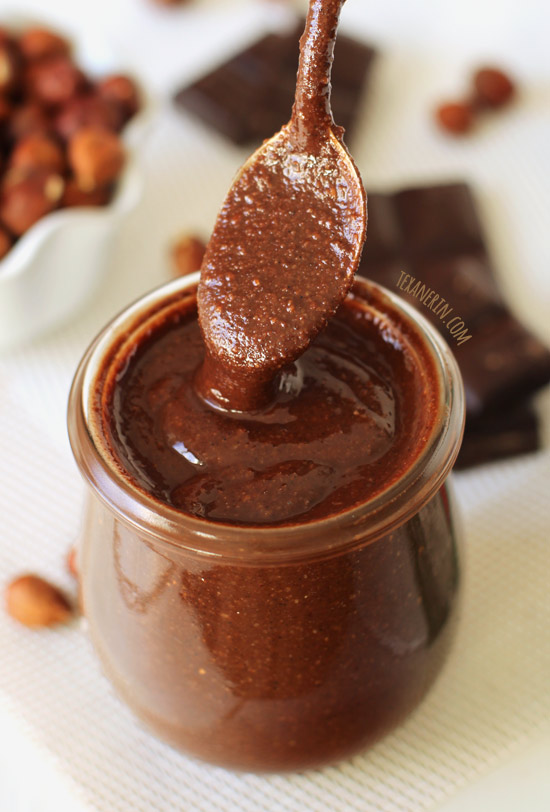
Homemade Chocolate Hazelnut Butter

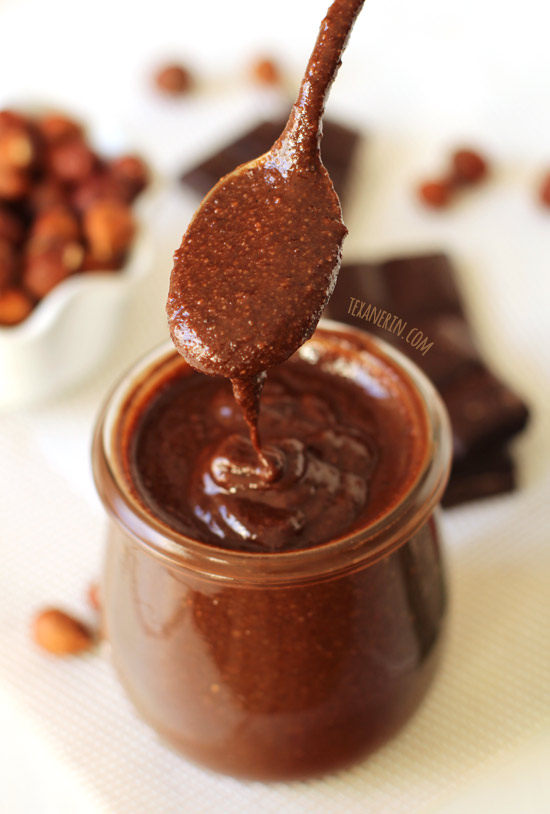
his naturally sweetened chocolate hazelnut butter spread has just four ingredients and only takes minutes to make!

Chocolate Hazelnut Butter – naturally sweetened and really easy!

I already have a chocolate peanut butter spread recipe up, but this one is a little different (other than the whole nut type thing). This chocolate hazelnut spreaduses Dutch process cocoa powder for the chocolate flavor and coconut sugar to sweeten. (You know what’s lame? I just realized I threw some chocolate in the background of these pictures. Haha. Yeah. Ignore that! It’s just representative. ;))
The chocolate peanut butter uses a little cocoa powder, but mostly chocolate chips to flavor and sweeten it, meaning this hazelnut butter is technically a little healthier. Sugar is sugar but if you like to naturally sweeten stuff, this is your recipe! It also means that this version is naturally dairy-free and vegan. And like the peanut butter, naturally gluten-free!
Chocolate Hazelnut Butter – naturally sweetened and super easy!
I originally wanted to call this “Healthy Homemade Nutella” but Mr. Texanerin, the Nutella fiend that he is, heard of my plans and his response? “NO! Absolutely not!” Apparently this is just chocolate hazelnut butter. I hope you can cope. ;)
To be honest, he’s correct in that this chocolate hazelnut butter doesn’t taste much like Nutella. Or okay – at all. It’s not as smooth and not nearly as sweet, but it is chocolatey. And much more hazelnut-y. Chocolatey using cocoa powder and not that much sugar. I used a range of amounts for both of those ingredients, just because I have quite the sweet tooth and don’t like dark chocolate, so the amount of sugar I use might not (and hopefully won’t be!) what you need.
Chocolate Hazelnut Butter – naturally sweetened and incredibly easy!


Chocolate Hazelnut Butter Spread

♥♥♥♥♥
Rated 5.0 by 7 readers
Homemade Chocolate Hazelnut Butter
  • Prep Time: 
  • Cook Time: 
  • Ready in: 
  • Yield: ~1½ cups

Ingredients

Directions

  1. Preheat the oven to 350°F (176°C) and place the hazelnuts on a rimmed baking sheet. There should only be a single layer. Use more baking sheets, if necessary.
  2. Roast the nuts for 15 minutes, stirring after every 5 minutes. The hazelnuts will be fragrant when ready and the skins will start to crack. Place the nuts in the center of a spread-out clean kitchen towel. Bundle it up and then rub the nuts together to remove the skin. This should remove about half of the skin and that's enough. The nuts should still be warm but not super hot at this point. If they are hot, wait for a few minutes, until they're just warm, before placing in the food processor. Also be sure not to let the nuts cool down completely – it'll process quicker if the nuts are still warm.
  3. Transfer the roasted nuts, being careful to not include the skin, to a food processor and process until it’s very creamy like peanut butter. It’ll depend on your food processor, but it took mine about 3–5 minutes.
  4. Add 3 tablespoons of cocoa powder, ¼ cup sugar, and the salt. Add more cocoa powder and sugar to taste.
  5. Spoon the butter into a glass jar and refrigerate for up to 2 months.
Let me know what you guys think of this amazingly delicious homemade Nutella! Comment below your thoughts! Use wisely and again DON'T over-indulge. I hope you enjoy this healthier alternative to a sweet snack and keep going on your weight loss journeys'! your doing amazing!

Source
http://www.texanerin.com/2014/05/homemade-chocolate-hazelnut-butter.html

Wednesday, 5 August 2015

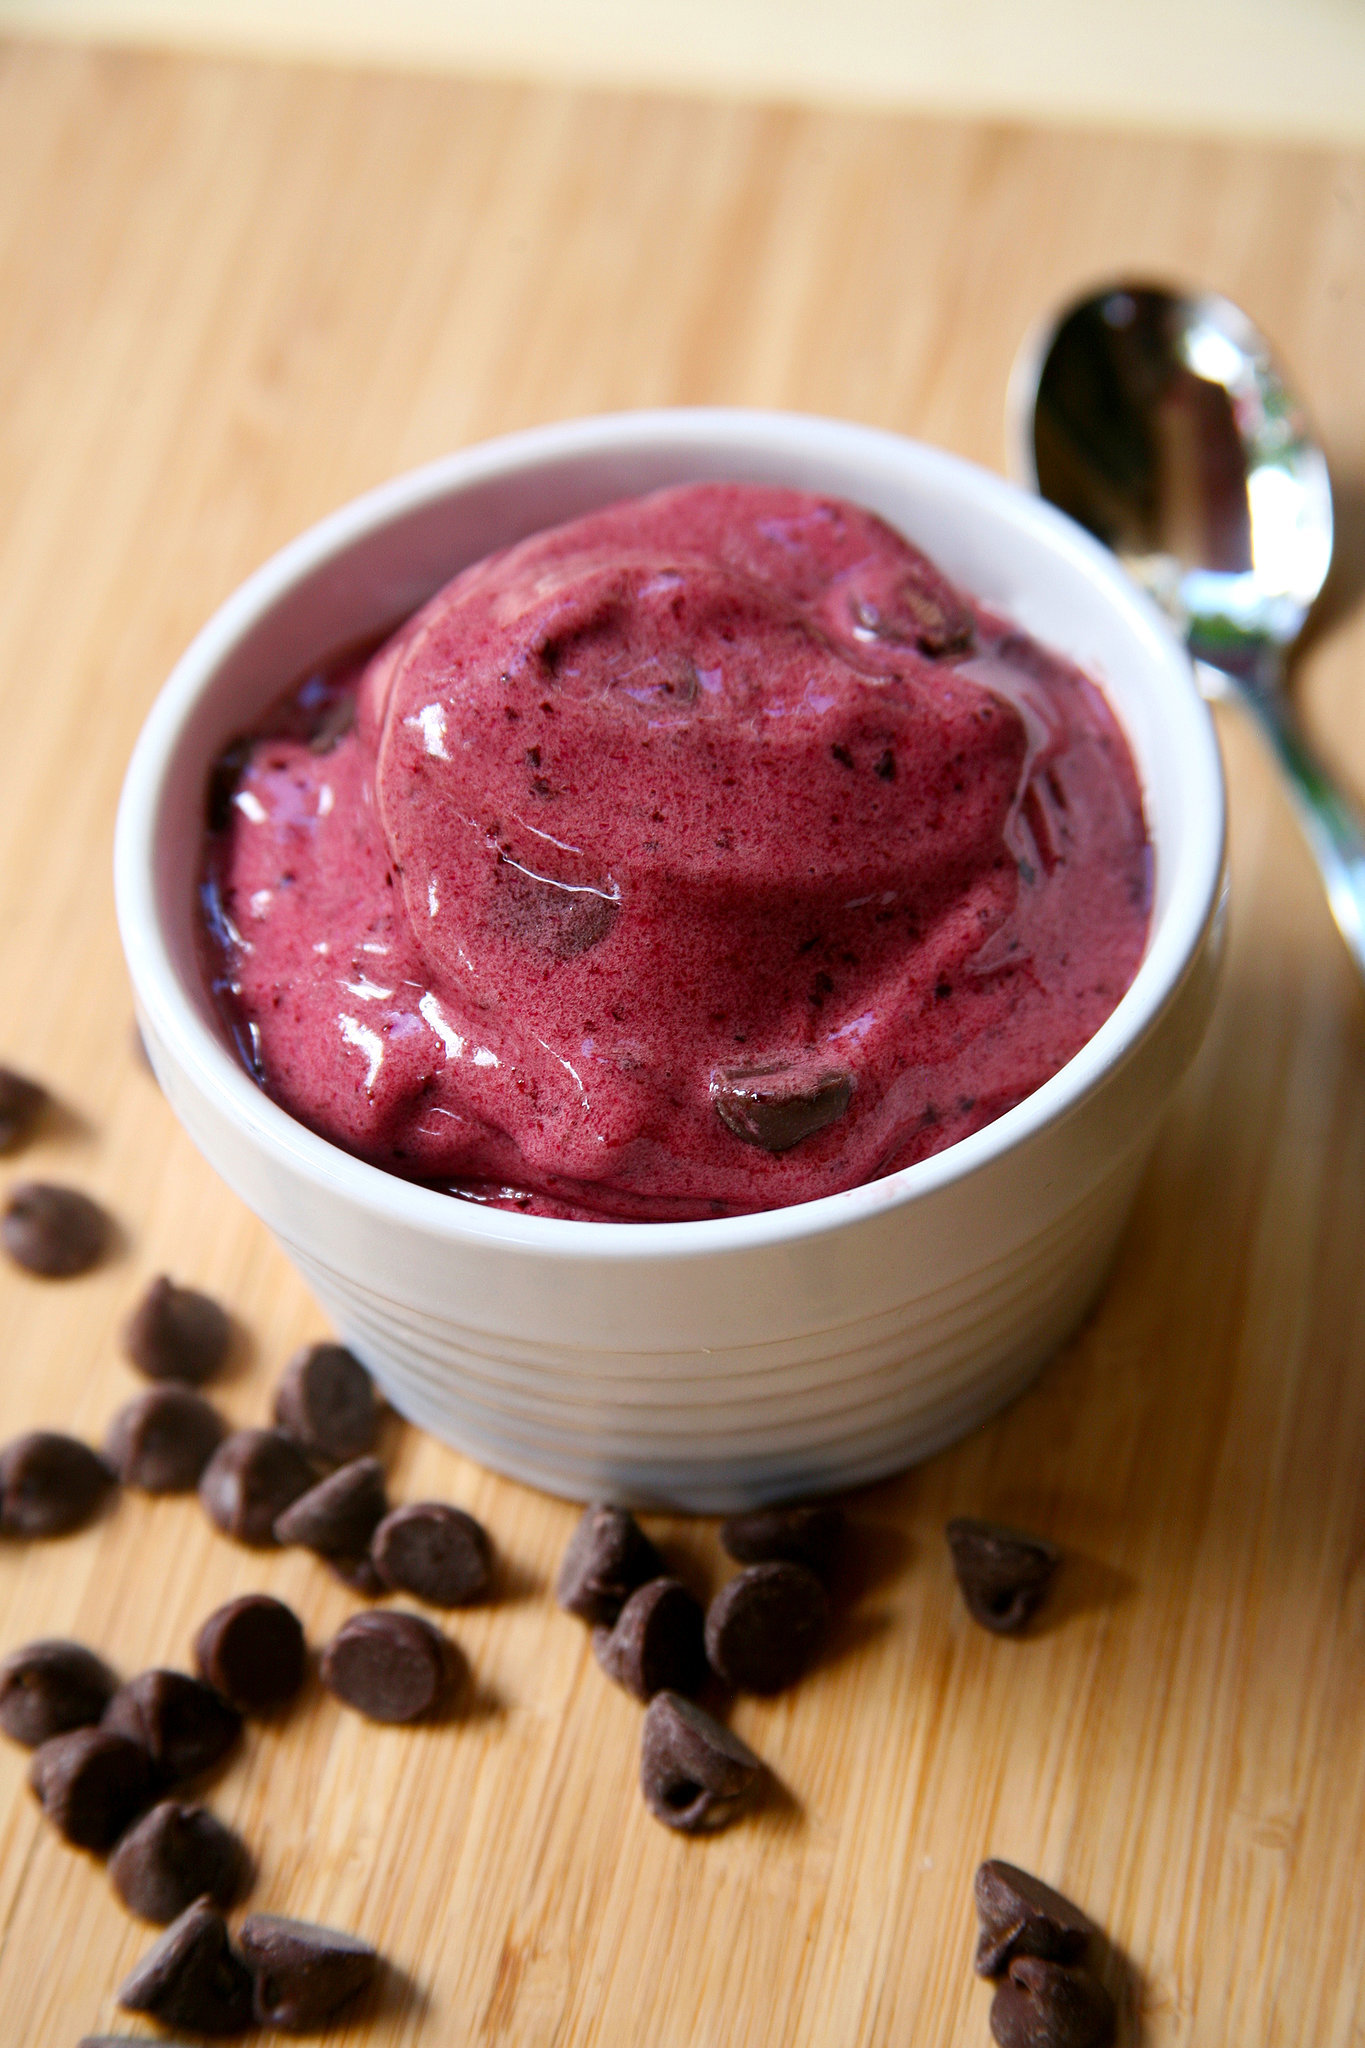
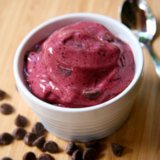
No Ice Cream Maker Required! Low-Calorie Cherry Chocolate Ice Cream

If you love Ben & Jerry's Cherry Garcia Ice Cream but don't love that a half-cup serving is 200 calories, get out your food processor, a spoon, and a smile. This homemade ice cream is chock-full of cherry and chocolate goodness but without saturated fat and cholesterol.


Made with just four ingredients — fresh cherries, a banana, almond milk, and chocolate chips — this creamy recipe couldn't be easier to whip up. And the flavour? Holy sweet cherry ecstasy! Seriously. You can see the fruitiness just bursting out of the bowl.


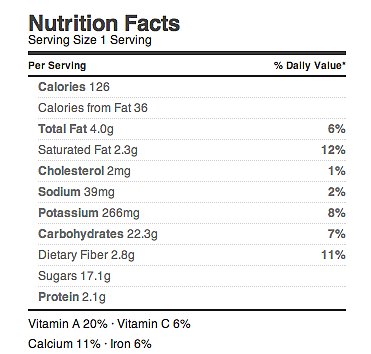
And because it's made with fresh cherries, you get the antioxidant benefits, the filling fibre, and the potassium you wouldn't get with a bowl of ice cream. But really, it's the creamy texture and luscious flavour that make this recipe a winner — all for just 126 calories per lip-smacking serving.

Vegan Cherry Chocolate Chip Ice Cream

NOTES

If you put the ingredients in the freezer the night before, this recipe takes less than 10 minutes to make!
Delicious Cherry Chocolate Chip Ice Cream | Vegan

INGREDIENTS

2 cups cherries, fresh
1/2 banana
1/2 cup unsweetened almond milk
3 tablespoons dairy-free chocolate chips

DIRECTIONS

  1. Wash and dry the cherries, and remove all the pits. Place in a freezer bag or glass container, and freeze for at least three hours. If you don't have the time, you can use frozen cherries.
  2. Peel a banana, and place half in the freezer.
  3. Pour 1/4 cup of the almond milk into ice cube trays (save the other 1/4 cup), and freeze those as well, for at least three hours.
  4. Place the frozen cherries, half a frozen banana, the almond-milk ice cubes, and 1/4 cup almond milk in a food processor, and process until completely smooth, several minutes.
  5. Stir in chocolate chips, and enjoy immediately!


NUTRITION

Calories per serving:
 
126 calories

Source
http://www.popsugar.com.au/fitness/Delicious-Cherry-Chocolate-Chip-Ice-Cream-Vegan-35589695

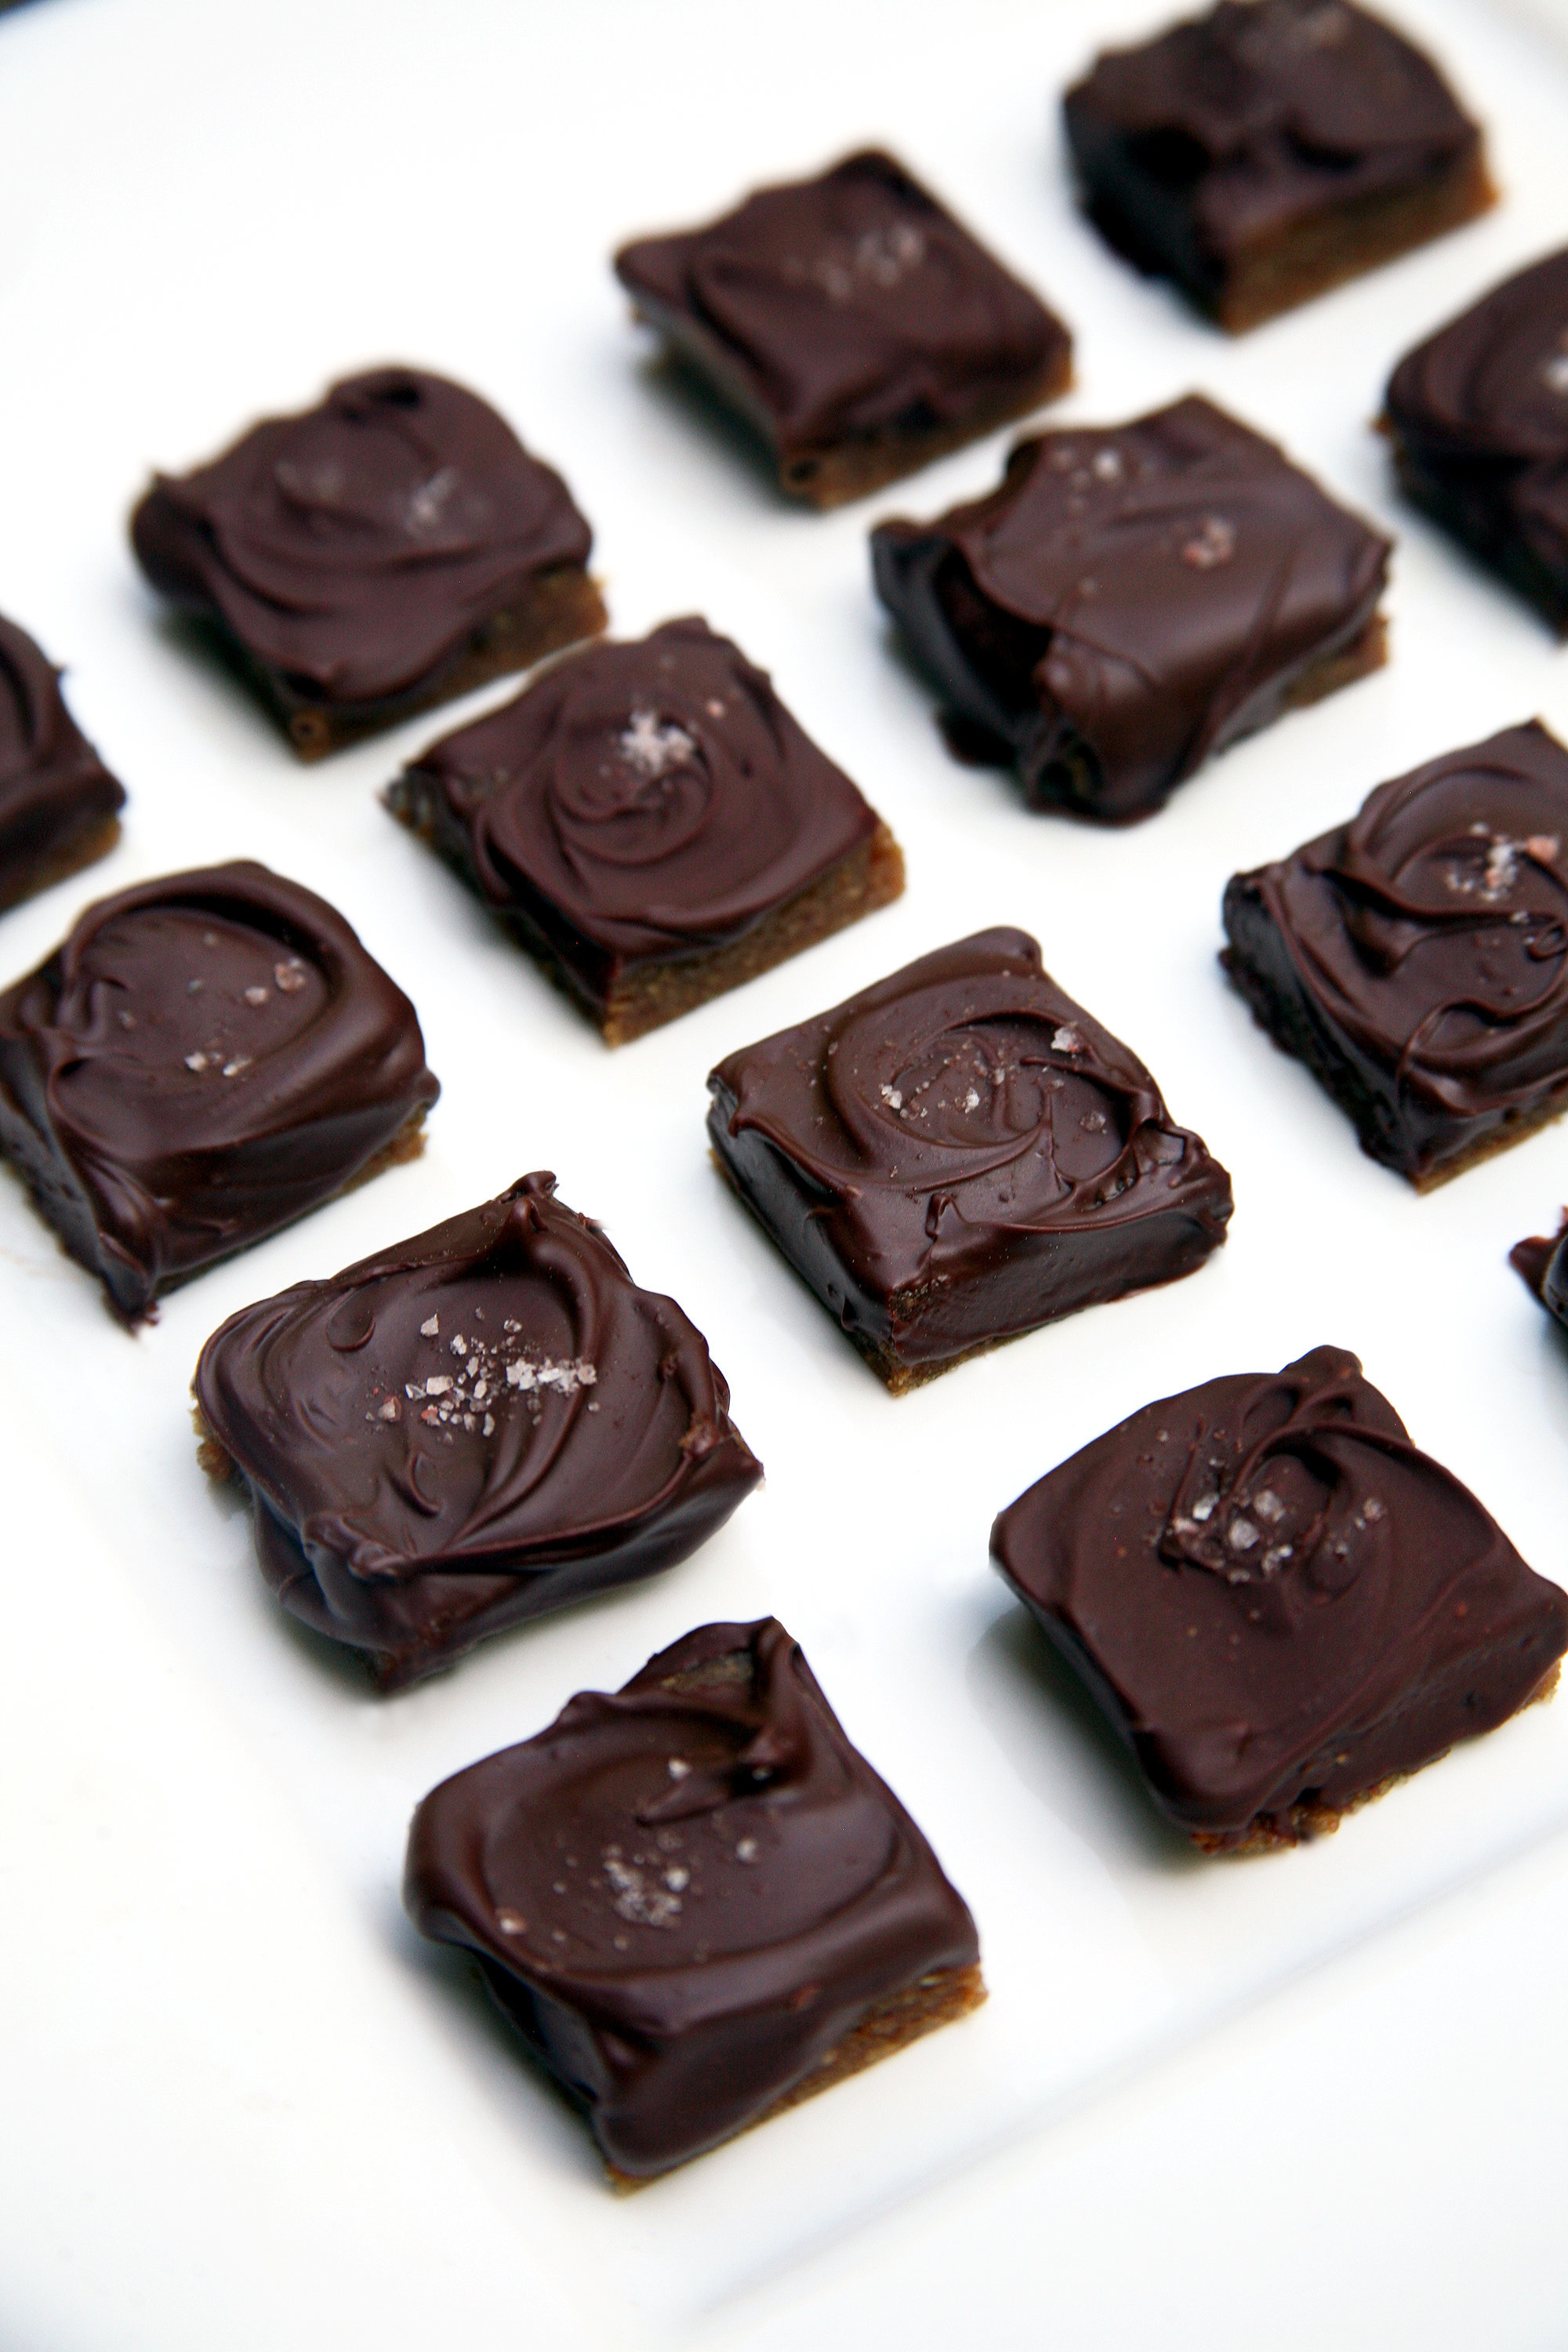
4-Ingredient Chocolate Salted Caramels That Are Actually Healthy

You open up a box of chocolates and choose carefully. Strawberry sundae? Nah. Orange truffle. Ugh, no. Chocolate-covered caramel? Yes, please! You can indulge in one of these for 95 calories, or make your own using four basic ingredients, for only 60 calories.

No cooking thermometer needed! These babies couldn't be easier to whip up. Just place sunflower seeds, dates, and sea salt in a food processor. Press into a pan and freeze.


Cut into squares, smother with melted chocolate, sprinkle on some sea salt (I used pink Himalayan), and pop them back in the fridge. Now there's a sweet treat you can feel good indulging in.


These are nut free, gluten free, dairy free, and absolutely delicious — they taste just like the real thing! Give them as a home-made gift, bring them to the office, or just keep a batch in the fridge when sweet, chocolaty, chewy caramel cravings strike.

Dark Chocolate Salted Caramels

Healthy Dark Chocolate Salted Caramels Recipe

INGREDIENTS

1 1/2 cups unsalted roasted sunflower seeds
2 cups medjool dates (16), pitted
1/4 teaspoon fine sea salt
3/4 cup dairy-free chocolate chips
Sea salt for topping (optional)

DIRECTIONS

  1. Place the sunflower seeds, dates, and fine sea salt in a food processor. Blend until smooth for several minutes, until a thick dough forms.
  2. Press the mixture firmly into an 8-by-8-inch pan. If the top is oily (from the sunflower seeds), gently blot it with a paper towel.
  3. Place pan in the freezer for at least 20 minutes.
  4. While the caramel is firming up, melt the chocolate chips in a double boiler (in a small glass bowl over a small pot of boiling water).
  5. Remove the pan from the freezer. Take a butter knife and go along the edges of the pan to loosen it up. Turn the pan over onto a cutting board lined with baking paper. Cut into 49 pieces (7 rows of 7).
  6. Using a small spoon (I used a metal baby spoon), drizzle a small dollop of melted chocolate over the top of each caramel square, using the back of the spoon to smooth it out and get chocolate along the edges. Sprinkle with sea salt, if you like. Place the cutting board in the fridge for 20 minutes to harden the chocolate.
  7. Enjoy! Store uneaten caramels in an airtight container in the fridge.

    NUTRITION

    Calories per serving:
     
    60
Source
http://www.popsugar.com.au/fitness/Healthy-Dark-Chocolate-Salted-Caramels-Recipe-37527086

Wednesday, 29 July 2015

11 Benefits of Almond Milk You Didn’t Know About

Those looking for a dairy-free milk substitute have probably stumbled across almond milk and wondered, “Is almond milk good for you?” Whether you’re a vegan, sensitive to milk or just don’t like the taste, almond milk is a fabulous alternative.
While almond milk is becoming more and more popular, it’s important to note that it doesn’t provide as much protein or calcium to be a completesubstitute, so make sure you receive adequate amounts from other sources. One cup only has one gram of protein versus 8 grams in cow’s milk, and 2 milligrams of calcium versus 300 milligrams in cow’s milk.
As with everything you buy, make sure to check the labels and purchase almond milk that contains the least amount of preservatives and other additives.

11 Benefits of Almond Milk

1. It helps with weight management.

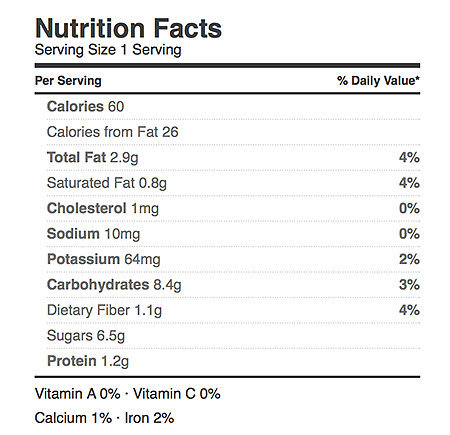
One cup of almond milk contains only 60 calories, as opposed to 146 calories in whole milk, 122 calories in 2 percent, 102 calories in 1 percent, and 86 calories in skim. It makes for a great substitute that will help you lose or maintain your current weight.

2. It keeps your heart healthy.

There’s no cholesterol or saturated fat in almond milk. It’s also low in sodium and high in healthy fats (such as omega fatty acids, typically found in fish), which helps to prevent high blood pressure and heart disease.

3. It keeps your bones strong.

While it doesn’t offer as much calcium as cow’s milk, almond milk does offer 30 percent of the recommended daily amount, as well as 25 percent of the recommended amount of vitamin D, reducing your risk for arthritis and osteoporosis and improving your immune function. Plus, these two nutrients work together to provide healthy bones and teeth formation.

4. It keeps your skin glowing.

Almond milk contains 50 percent of the recommended daily amount of vitamin E, which contains antioxidant properties essential to your skin’s health, such as protecting it against sun damage.

5. It barely impacts your blood sugar.

Almond milk (with no additives) is low in carbs, which means it won’t significantly increase your blood sugar levels, reducing your risk for diabetes. Because of its low glycemic index, your body will use the carbs as energy so the sugars aren’t stored as fat (score!).

6. It contributes to muscle strength and healing.

Although almond milk only contains 1 gram of protein per serving, it contains plenty of B vitamins such as iron and riboflavin, both important for muscle growth and healing.

7. It keeps your digestion in check.

Almond milk contains almost one gram of fiber per serving, which is important for healthy digestion.

8. It doesn’t contain lactose.

Lactose intolerance impacts about 25% of the US population, which means they have difficulty digesting the sugar in cow’s milk. This makes almond milk a suitable, lactose-free substitute.

9. It tastes better than cow’s milk.

Almond milk doesn’t taste like cow’s milk, perfect for those who are turned off by the taste. It has its own unique flavor many describe as being light and crisp. Bonus: it’s versatile, meaning you can use it instead of cow’s milk in recipes that require it. It won’t have the same taste, but it will have the same consistency.

10. It doesn’t require refrigeration.

Knowing that you don’t have to refrigerate almond milk means you’ll be more likely to take it with you to work, or on a camping trip. It’s perfectly fine at room temperature which makes it a convenient, nutritious staple to pack, automatically upping your daily intake of all the fabulous nutrients above.

11. It’s easy to make.

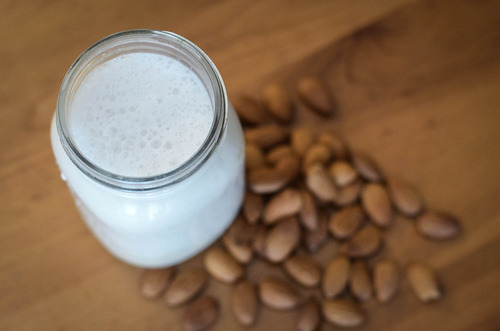
Being that it’s a tad inconvenient to have a cow grazing in your backyard, almond milk is the convenient alternative to make at home. It’s made by finely grinding almonds and placing them in a blender with water, then filtering the pulp with a strainer to separate it from the liquid. Want to give it a try? Here’s a delicious almond milk recipe.


Source
http://www.lifehack.org/articles/lifestyle/benefits-almond-milk.html

Tuesday, 28 July 2015

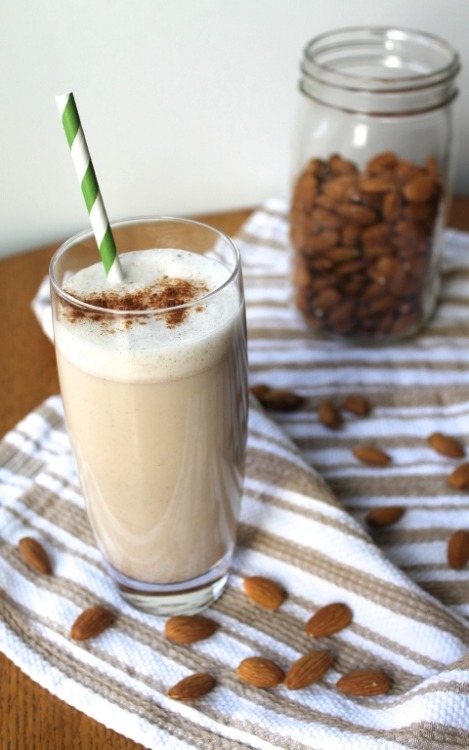
HOMEMADE VANILLA ALMOND MILK

Do you know what one of my favorite parts of my juice cleanse was? It was finally getting to that moment in the day where I was able to enjoy the vanilla almond juice. It was the final juice of the day, and by far, my favorite. Unlike the other juices, this one had more of a smoothie consistency, feeling far more substantial and filling. It also tasted amazing. It was hard to believe there was no sugar in the drink! There were only four ingredients: vanilla bean, almonds, dates, and filtered water.
Even though I didn’t love the last juice cleanse I did, I must admit that I miss drinking that final juice of the day. Of all the juices I’ve ever had, in my life, I have to say it is my favorite.
While I’d love to have that drink every day of my life, I don’t think my paycheck could support that kind of habit! So an alternative will have to do.
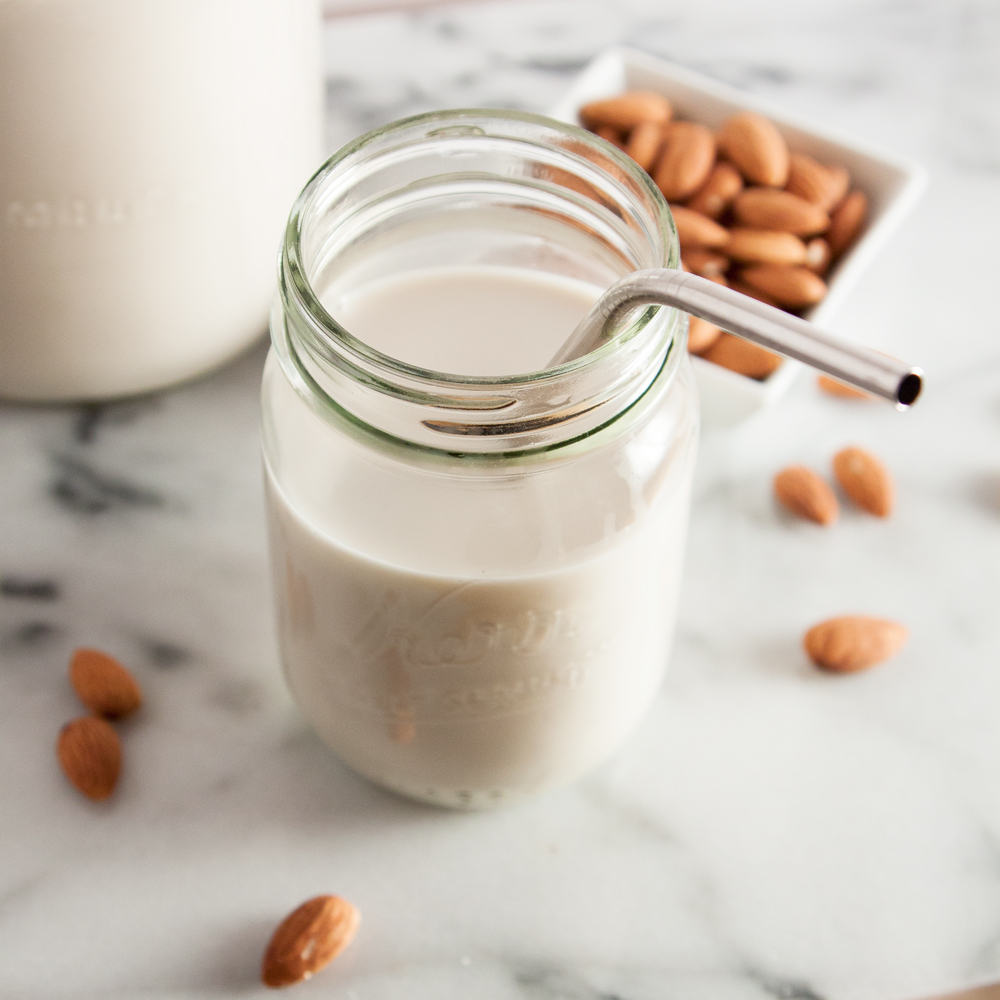
Almond milk isn’t exactly the same as the vanilla almond juice that I had in my cleanse, but it’s close, and it definitely satisfies my cravings! This recipe uses the same ingredients as the drink from my cleanse, and it’s a surprisingly easy recipe to follow! Grab your cheesecloth and get started!
Homemade Vanilla Almond Milk
Makes 5-6 cups of almond milk
Ingredients:
  • 1 1/2 cups raw almonds
  • 5 + 2 cups filtered water
  • 1 tsp Pure Vanilla Extract (or real vanilla bean) [I chose to use pure vanilla extract instead of real vanilla bean based on price]
  • 2-4 large Medjool dates, pitted
Directions:
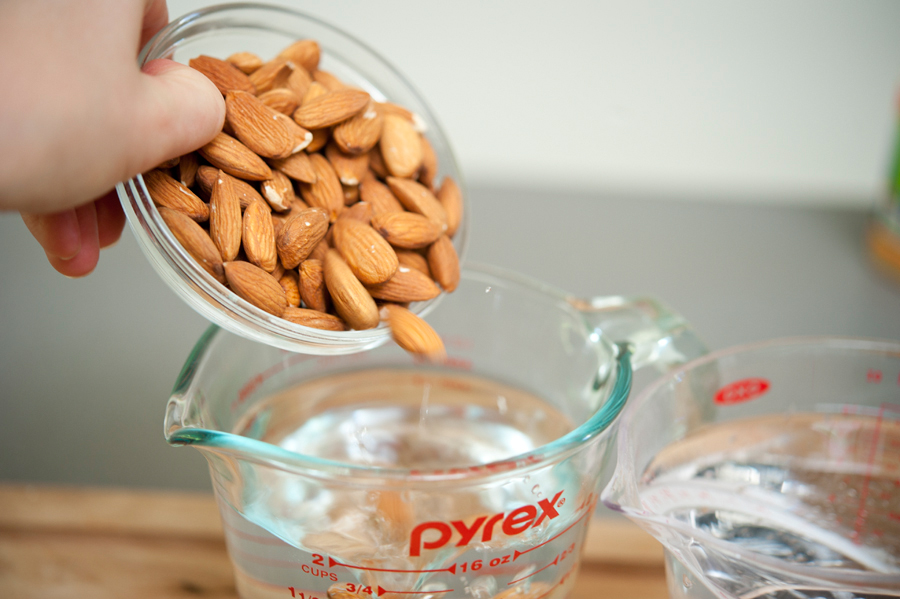
1. In a large bowl, soak the raw almonds in filtered water. Make sure the filtered water covers the top of the almonds. Cover the bowl and let the almonds soak overnight. They will expand to nearly twice their size! You can soak them up to 24 hours, but don’t let them soak longer or else they might begin to rot!
2. When you’re ready to make the almond milk, drain and rinse the plump almonds. Then, throw the almonds in the blender or food processor (I’m using a Vitamix) along with 5 cups of filtered water, vanilla extract, and dates. Blend until smooth.
3. Now it’s time to strain the almond juice using the cheesecloth. Lay the cheesecloth over a large bowl (for your almond milk). Pour some of the blended almond milk over the cheesecloth to strain out the chunks. Do this little by little so you aren’t overwhelmed! Wring the cheesecloth to get all the moisture possible out of the blended almonds.
The pulp that remains in the cheesecloth is actually almond meal. You can set that aside and freeze to use in recipes (like in macarons!)
4. Continue to strain the almond juice until you have no blended almonds remaining.
That’s it! Shake the juice before drinking, as separation WILL occur. Keep refrigerated, and drinking within 5 days.
*Tip* for a thicker almond milk, add less filtered water. For a sweeter almond milk, add more dates.

Source
http://www.thesassyRlife.com/homemade-vanilla-almond-milk/

Tuesday, 7 July 2015

18 Healthy Summer Breakfasts & Smoothies to Try

Enjoy light fresh summer breakfasts and organic smoothies all through the year made with a variety of organic fruits, try it with your choice of Nature's Path organic granola, light organic honey, a variety of organic yogurt from either Liberté, Organic Meadow or Olympic Dairy and eggs. Replace milk products with organic coconut milk in smoothies or try it with organic soy milk. Add a cup of organic teas or fresh organic orange juice for the perfect way to start your day. 

1. Flour free Banana & Blueberry Pancakes

This weekend we went to our country house, 30 min outside of Stockholm. We spent the whole saturday watching season one of the HBO series “The Wire”. Sunday morning we decided to take a break from our tv-marathon and made a no-sugar-super-healthy-very-delicious brunch: Flour free Banana & Blueberry Pancakes, Spelt & Muesli Scones, Fruit salad, and Superfruit Smoothie. Here is the recipe for the pancakes.

Banana & Blueberry PancakesServes 4
3 ripe bananas
6 organic eggs

1 cup / 100 g shredded coconut
1/2 cup / 70 g fresh blueberries or thawed frozen
1 tsp ground cinnamon
coconut oil, for frying


Make the batter: Peel the bananas and mash with a fork. Whip eggs in a bowl and mix it together with the mashed bananas. Add shredded coconut, blueberries and cinnamon and stir to combine.
Fry the pancakes: Heat coconut oil in a frying pan on medium heat. Pour 3 small portions of pancake batter in the pan at the time and fry the pancakes on both sides. Serve with shredded coconut and blueberries and dust with cinnamon.


2. Coconut Blueberry Oatmeal 


** Serves two
  • 2 cups of Quaker oatmeal
  • 1 handful of blueberries
  • 1 sliced banana
  • 1 cup lactose-free milk [ I like Lactaid ]
  • 2 sprinkles of unsweetened coconut shavings
  • 1 dash cinnamon
  • 1 dash nutmeg


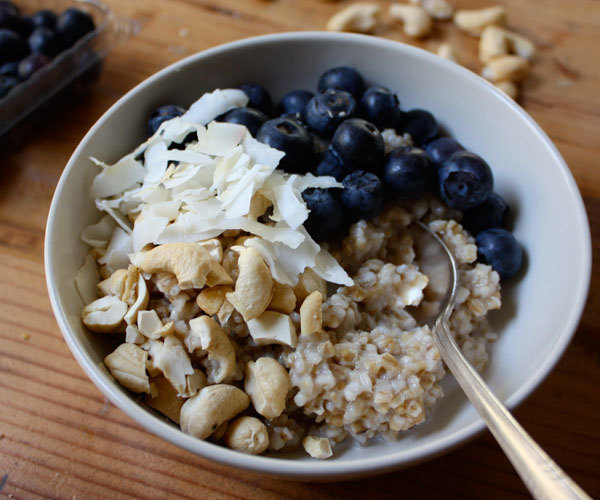
Slice banana & clean blueberries. Cook oats on the stove for about five minutes. Drain oats and add blueberries and bananas. Sprinkle coconut shavings, cinnamon and nutmeg over fruit. I like to let it sit for 2 minutes so fruit dissolves into the oats. Add 1/2 cup of lactose-free milk, almond milk or soy milk. Enjoy with fresh orange juice!

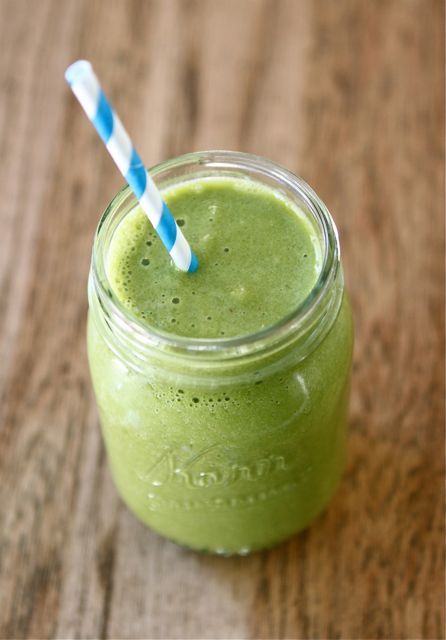
3. Slammin' Sunrise "Green" Smoothie


Ingredients:


  • 2-3 cups organic spinach
  • 1 cup unsweetened vanilla almond milk
  • 1-2 cups frozen strawberries
  • 1 cup frozen blueberries
  • 1/2 frozen banana
  • 2 tablespoons flaxseeds

Preparation Instructions:
  • Blend until smooth and vortex is created in center of blender (VitaMix!).
  • Pour and garnish with a fresh strawberry.
  • Serve and enjoy!!!


4. Honey Coconut Granola

  • 1/2 cup sliced organic strawberries
  • 1 cup organic blueberries
  • 1 organic banana
  • 1 cup organic granola
  • unsweetened organic coconut shavings
  • 2 tbsp organic honey


5. Small French Breakfast

  • Organic granola topped with organic honey, coconut, bananas and 1% milk
  • 1 organic orange
  • 1 slice whole grain toast
  • 1 hard or soft boiled egg
  • replace cheese with kosher or organic breakfast meat
  • 1 glass organic orange juice
  • 1 glass organic  smoothie with strawberry, blueberry, banana, organic coconut yogurt and honey


5. Herbed baked Eggs
  • 1 tbsp organic butter, softened
  • 1/2 tsp fresh organic rosemary, minced
  • 1/2 tsp fresh organic thyme, minced
  • 1 tbsp fresh organic parsley, minced
  • 8 organic eggs
  • 4 strips organic bacon, cooked and crumbled
  • 1/4 cup organic spinach, sautéed and chopped
  • salt and pepper to taste

Heat oven to 375°F. Butter four ramekins. Combine the cheese and herbs in a small bowl. Crack two eggs into a bowl or cup, taking care not to break the yolks. Pour the two eggs into a ramekin and repeat until all four ramekins have eggs. Sprinkle bacon, kale, and the cheese-herb blend over the eggs. Finish with a dash of salt and freshly ground pepper. Bake the eggs for 10-15 minutes until the eggs have achieved desired completeness: less time for medium yolks, more time for firm yolks. Keep in mind that shallow ramekins will cook faster than deeper ramekins. Serve immediately.


6. Green Morning Smoothie

  • 1 organic banana, roughly chopped
  • 4 or 5  organic strawberries
  • 1/2 cup fresh organic blueberries
  • 1 small organic peach, peeled and roughly chopped
  • 1 heaping cup (or more) fresh organic spinach leaves, thoroughly rinsed
  • splash organic vanilla soy milk
  • 1 tablespoon organic greek honey yogurt
  • 2 teaspoons organic honey
  • 1/2 cup crushed ice

Place all ingredients in a blender and blend until smooth. Serve immediately.
*this recipe makes a very large smoothie- two may share or store in the freezer.


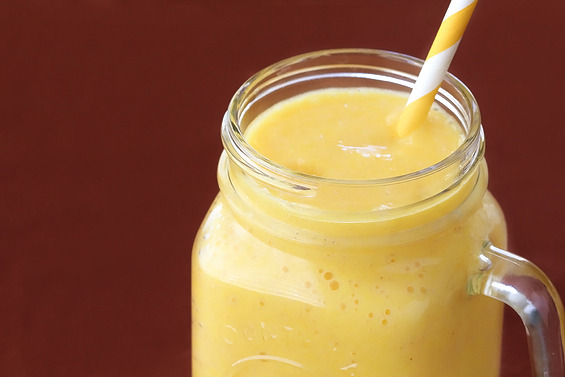
7. Pinapple & Banana Flaxseed 

Smoothie

  • 2 cups of loosely packed organic spinach
  • 1 frozen organic banana cut into 4-5 pieces
  • 1/2 cup of frozen organic blueberries
  • 1/2 cup of frozen organic blackberries
  • 1/2 cup of organic pinapple
  • 1/2 cup of organic orange juice
  • 2/3 cup of or organic coconut yogurt 
  • 2 tablespoons organic flaxseeds 

Place all ingredients in a blender and blend until smooth. Serve immediately.
*this recipe makes a very large smoothie- two may share or store in the freezer.


8. Grape and flaxseed smoothie

  • 300g black seedless grapes
  • 150g red seedless grapes
  • 1 cup rice milk (or other non-dairy milk)
  • Honey or agave nectar to taste (I used around 2 tspns of honey)
  • 2 (20ml) tblspns flax seeds, ground
  • Unsweetened Greek yoghurt

Ensure all ingredients are chilled before using.
Process first 5 ingredients  in a blender until smooth (or use stick blender).  Pour into two large glasses and stir through a couple of generous tablespoons of Greek yoghurt to thicken.
Serves: 2


9. Strawberry Walnut Granola
  • 4-5 sliced organic strawberries
  • 1-2 sliced organic kiwi
  • 1 organic banana sliced
  • 1/2 cup organic coconut yogurt or 1% milk
  • a handful of organic walnuts
  • 1 cup organic granola
  • 2 tbsp organic honey
  • unsweetened shaved organic coconut

10. Raspberry Banana Waffles
  • 1/4 cup organic raspberries
  • 1/4 cup organic blueberries
  • 1 organic banana sliced
  • 2 organic waffles
  • 2 tbps organic honey
  • unsweetened shaved organic coconut

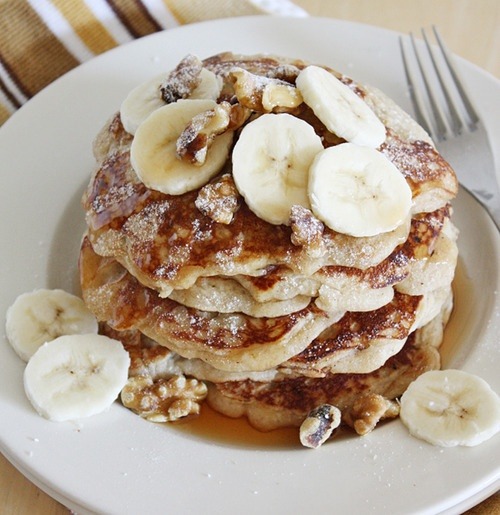
11. Banana Coconut Walnut Pancakes
  • 1 1/2 cups organic flour
  • 1 tablespoon organic cane sugar
  • 2 3/4 teaspoons baking powder
  • 1 teaspoon salt
  • 1 1/4 cups 1% milk
  • 1 organic egg
  • 1 teaspoon organic vanilla extract
  • 2 tbsp organic butter, melted
  • 1 teaspoon organic coconut oil, or as needed
  • 1 very ripe organic banana, mashed
  • 1/4 cup  organic walnuts
  • 2 tbsp organic honey
  • unsweetened shaved organic coconut

Directions

  1. Whisk flour, 1 tablespoon white sugar, baking powder, and salt together in a bowl. Mix milk, egg, and vanilla extract together in a separate bowl. Stir milk mixture into flour mixture until incorporated.
  2. Beat banana in a bowl with an electric mixer until smooth and creamy; mix creamed banana into batter. Stir melted butter into batter. Refrigerate batter for 10 minutes.
  3. Heat oil in a skillet over medium heat. Drop batter by large spoonfuls into the hot oil, and cook until bubbles form and the edges are dry, 3 to 5 minutes. Flip, and cook until browned on the other side, 3 to 5 minutes. Repeat with remaining batter.
  4. Combine 1 cup white sugar, buttermilk, and butter in a saucepan over medium heat until sugar is dissolved. Bring to a boil for 1 minute; reduce heat and mix coconut extract and baking soda into the syrup. Simmer until baking soda is dissolved, 1 to 2 minutes.


12. Banana Honey Granola
  • 1 organic sliced banana
  • 1 cup organic granola
  • 1% milk
  • 2 tbsp organic honey 


13. Berry Kiwi Breakfast
  • 1 cup organic strawberries
  • 1 cup organic raspberries
  • 2 organic kiwis
  • a glass of fresh organic smoothie or organic orange juice


14. Raspberry Granola
  • 1 organic banana
  • 1/4 cup organic raspberries
  • 1/2 cup organic granola
  • 1 % milk
  • 2 tbsp organic honey


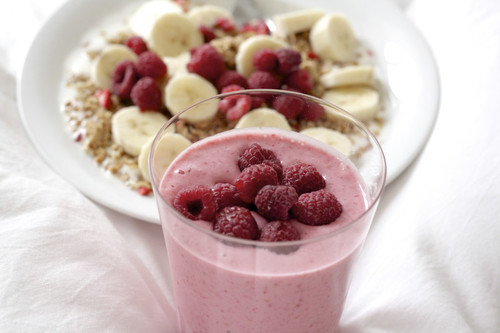
15. Raspberry Banana Yogurt Cup
  • 1 cup organic yogurt frozen banana
  • 1/2 cup organic granola 
  • 1/2 cup organic raspberries
  • 1/4 cup organic pecans
  • 1 organic banana
  • 2 tbsp organic honey


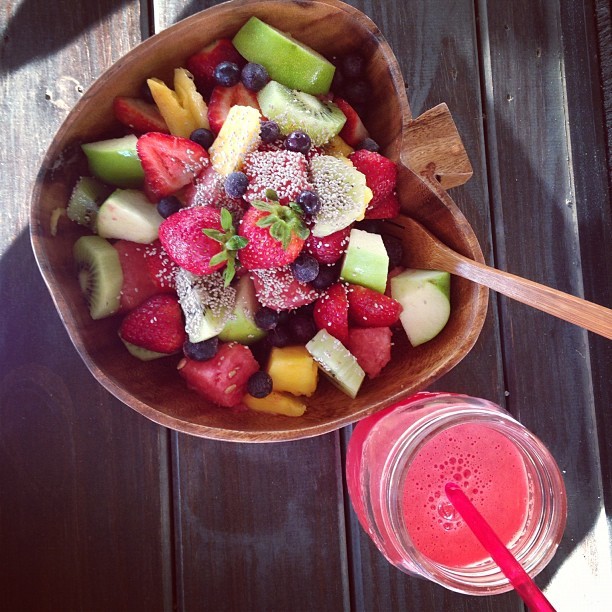
16. Fruit Bowl
r-o-s-yy:☆
  • 1/4 cup cubed organic watermelon
  • 2 sliced organic kiwi
  • 1/4 cup organic strawberries
  • 1/4 cup organic blueberries
  • 1/4 cup organic pear
  • 1/4 cup organic mango


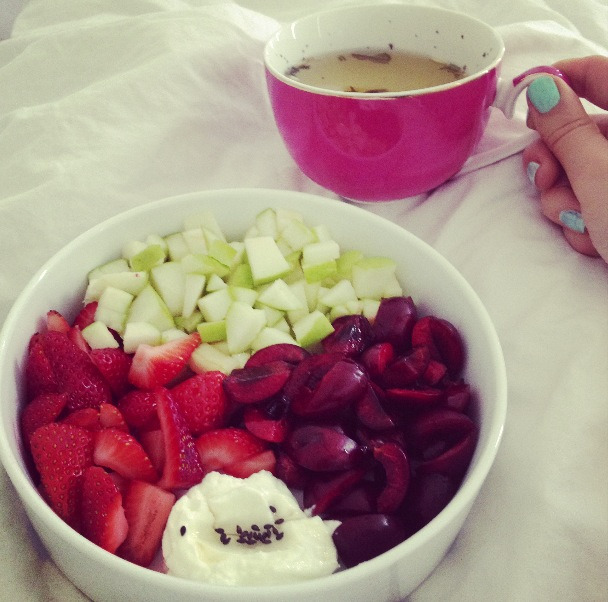
17. Summer Fruit Breakfast
    yummm
  • 1/2 cup organic strawberries
  • 1/2 cup organic cherries
  • 1/2 cup organic pear
  • 1/2 cup organic yogurt


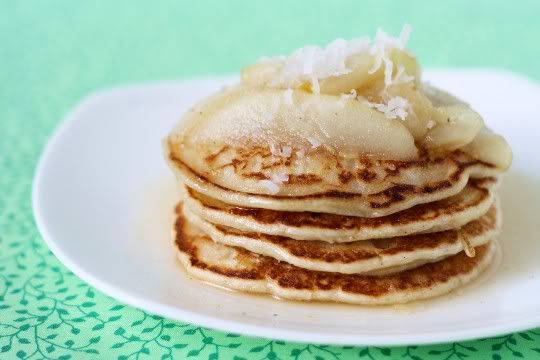
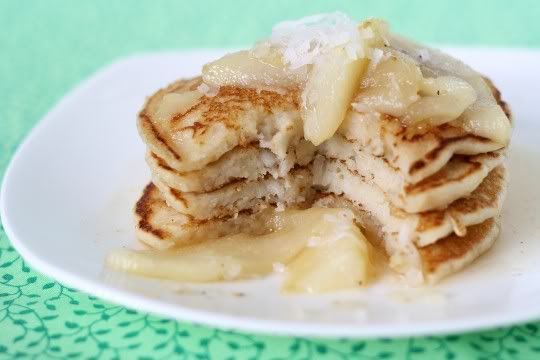
18. Double Coconut Pancakes with Vanilla Pear Sauce


Double Coconut Pancakes with Vanilla Pear SauceOne bite of these luscious, decadent coconutty pancakes and you'll be on cloud nine. But paired with the warm sugary vanilla pear sauce? You'll be in heaven!


I'm not kidding. Take your first bite, and everything else suddenly ceases to exist. This dish makes for an amazing breakfast, served with fresh fruit and tea to complete the meal. And like most pancakes, they're pretty easy to make (well, with the exception of that first one that always is a little questionable). The dreamy sauce is also pretty simple, and it's so quick that you can start this up once the pancakes are done (make sure to keep them warm) and serve everything at once.


The pancakes are a bit dense and can be slightly gummy in the middle if not cooked long enough, so make sure you keep the heat on the lower side so they will cook evenly. That being said, if they're soaked with enough of the pear sauce, the texture gets almost gooey and cake-like.


Although two forms of coconut are used in the batter, it actually ends up being quite mild in the finished product. The pancakes aren't overly sweet, but they do have a nice coconutty flavor with intermittent bits of crunchy flakes.

And the sauce...oh, the sauce. It's to die for. Pears cooked in butter, then simmered in a sugar syrup with lemon juice, vanilla, cardamom, and black pepper. Yes, black pepper! You culinarians will see where this is headed...chai tea! The cardamom and pepper make a great spice pairing to create a warm, exotic flavor which goes so well with the juicy pears. If you want more of a pronounced chai flavor, try doubling the spice amount or adding a little ground ginger.

The sauce is very sugary (perfect on the not-overly-sweet pancakes), but a hint of the salty butter and tangy lemon cut through that perfectly. I wouldn't suggest eating the sauce alone because of how sweet it is, but imagine its pairing possibilities: waffles, French toast, fruit salad, or even a dipping sauce. 


Double Coconut Pancakes
Double Coconut Pancakes with Vanilla Pear Sauce1 1/2 cups all-purpose flour
- 2 tablespoons sugar
- 2 tablespoons flaked sweetened coconut
- 1 teaspoon baking powder
- 1/2 teaspoon salt
- 14 oz. can light coconut milk
- 1 tablespoon vegan butter, melted (such asEarth Balance Original)
- Egg replacer for 1 large egg (such as Bob's Red Mill)

In a large bowl, combine flour, sugar, coconut, baking powder, and salt. In a separate bowl, combine coconut milk, butter, and egg replacer; stir well. Add coconut milk mixture to flour mixture, stirring until smooth. Pour about 1/4 cup batter per pancake onto a hot nonstick griddle or skillet. Cook 3 minutes or until tops are covered with bubbles and edges look cooked. Turn pancakes over; cook 2 minutes or until bottoms are lightly browned. Makes about 12 pancakes.


Vanilla Pear Sauce(adapted from Cooking Light, December 2006)

1 cup sugar
- 1/2 cup water
- 2 teaspoons vegan butter (such as Earth Balance)
- 2 cups peeled, thinly sliced pear
- 1 tablespoon fresh lemon juice
- 1 teaspoon vanilla extract
- 1/4 teaspoon ground cardamom
- Dash freshly ground black pepper


Combine sugar and water in a small saucepan over medium-high heat. Cook 3 minutes or until sugar dissolves, stirring constantly. Transfer syrup to a small bowl; set aside. Melt butter in pan over medium heat. Add pear to pan; cook 3 minutes or until soft, stirring frequently. Return syrup to pan; stir in fresh lemon juice, vanilla extract, ground cardamom, and freshly ground black pepper. Cook 5 minutes or until sauce is slightly thickened.


Source
http://www.caratandroses.com/foodie-eats/2013/7/13/summer-breakfasts-smoothies